The latest 8.6 RU2 update for Symantec ITMS added support for CEM (cloud enabled management) in preboot environments. This means that with the aid of automation folders (a feature of ITMS) we can boot a device into a preboot environment when out of the office, and push jobs and tasks to it over the internet!
What is CEM? Cloud-enabled Management (CEM) lets you manage client computers over the Internet using an Internet gateway that is located in the demilitarized zone (DMZ).
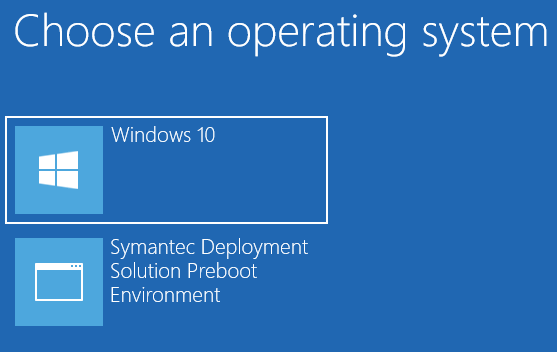
What are Automation Folders?
This is a preboot environment which is local to the device, and selectable as a boot option when turning on the device.
So where does OSDCloud come into this? Well, automation folders are great but they sadly lack support for WiFi and have limited PowerShell support. With the aid of OSDCloud, we can build a custom automation folder environment to fix these issues and then push this out to our devices.
How do you do this? First we’ll need two files:
- The boot.wim file from your OSDCloud media (mount the ISO and find this under the Sources folder)
- The boot.wim file from your Automation Folder (you can find this under C:\boot\altiris\iso\sources on a device with the automation folder installed)
Before you move on, get the file hash of the boot.wim from your Automation Folder. You’ll need this later on. You can use the PowerShell command Get-FileHash for this.
I won’t go into the details about creating your OSDCloud media, you can follow the instructions on David’s site. We’ll need the OSDCloud_NoPrompt.iso so be sure to create that. I also won’t go into details about setting up Automation Folders in your environment, Broadcom has useful documents to help you there.
Create the following folders on the computer you’ll be building your custom environment:
- C:\OSDCloudWIM
- C:\OSDCloudWIM\mnt
- C:\AutomationWIM
- C:\AutomationWIM\mnt
Mount the two WIM files from CMD line:
- Dism /mount-image /imagefile:C:\OSDCloudWIM\boot.wim /Index:1 /Mountdir:C:\OSDCloudWIM\mnt
- Dism /mount-image /imagefile:C:\AutomationWIM\boot.wim /Index:1 /Mountdir:C:\AutomationWIM\mnt
Now the two WIM’s are mounted, we will copy what we need from the mounted automation folder WIM to the mounted OSDCloud WIM, and edit the startutl.bat file:
- Copy the folder C:\AutomationWIM\mnt\Program Files\Symantec to C:\OSDCloudWIM\mnt\Program Files
- Copy the folder C:\AutomationWIM\mnt\Program Files\Altiris to C:\OSDCloudWIM\mnt\Program Files
- Copy the file C:\AutomationWIM\mnt\Windows\System32\startnet.cmd to C:\OSDCloudWIM\mnt\Windows\System32\startnet.cmd (you can overwrite the file)
- Copy the file C:\AutomationWIM\mnt\Windows\System32\startutl.bat to C:\OSDCloudWIM\mnt\Windows\System32\startutl.bat
- Copy all the files (NOT folders) from C:\AutomationWIM\mnt to C:\OSDCloudWIM\mnt
- Open the C:\OSDCloudWIM\mnt\Windows\System32\startutl.bat file and make the changes below
From the ‘REM net-start=Initialize WinPE and the network’ section (line 634) remove everything and replace it with the below. Save the file after making the changes.
:net-start
setlocal EnableDelayedExpansion EnableExtensions

ECHO Initialize Wireless Network
start /wait PowerShell -NoL -C Start-WinREWiFi
ECHO Initialize Network Connection (Minimized)
start /wait PowerShell -Nol -W Mi -C Start-Sleep -Seconds 10

echo Configuring WinPE firewall...
if defined _EnableFirewall (
  echo.  Firewall enabled.
  wpeutil EnableFireWall >nul
) else (
  echo.  Firewall disabled.
  wpeutil DisableFireWall >nul
)

endlocal
goto :eof
Now unmount the two WIM files:
- Dism /unmount-image /Mountdir:C:\OSDCloudWIM\mnt /commit
- Dism /unmount-image /Mountdir:C:\AutomationWIM\mnt /commit
Great! Now we have our updated OSDCloud WIM file with we can push it out to our devices and replace the standard one under C:\boot\altiris\iso\sources. For this I created a Software Release in ITMS and uploaded my custom boot.wim and an install script, a policy then delivers this to each device. The install script will check the file hash of the current boot.wim file, and if it doesn’t match the file hash of the new boot.wim file it will replace it.
Below is the install script (be sure to use the file hash you got earlier for your automation folder boot.wim file). The policy which delivers this to devices will download it to C:\temp\OSDCloudAutomation, the install script will then copy it from here to the correct location and delete it from temp. The registry values the script creates are used as a detection rule for the policy.
# Create logs folder
if (-not (Test-Path "$($env:ProgramData)\OSDCloudAutomation")) {
    New-Item -Path $env:ProgramData -Name 'OSDCloudAutomation' -ItemType 'directory' -Force
}

# Start logging
Start-Transcript "$($env:ProgramData)\OSDCloudAutomation\OSDCloudAutomation.log" -Append

# ====== Section to edit ======
# Version
$version = '1.0'
Write-Host "OSDCloudAutomation version = $version"

# OSDCloudAutomation boot.wim hash
$osdcloudhash = 'replace with hash of OSDCloud boot.wim'
Write-Host "OSDCloudAutomation boot.wim hash = $osdcloudhash"

# Default Automation Folder boot.wim hash
$hash = 'replace with original automation folder boot.wim hash'
Write-Host "Default Automation Folder boot.wim hash = $hash"
# ====== End section to edit =======

# Get current boot.wim hash
try {
    $bootwim = (Get-FileHash -path 'C:\boot\altiris\iso\sources\boot.wim' -ErrorAction Stop).hash
    Write-Host "Hash of current boot.wim = $bootwim"

    if ($($bootwim).hash -ne $osdcloudhash) {
        # Replace boot.wim with updated OSDCloud WIM
        Write-Host 'Installing OSDCloudAutomation boot.wim'
        try {
            # Copy OSDCloudAutomation boot.wim to C:\boot\altiris\iso\sources
            Copy-Item -Path 'C:\temp\OSDCloudAutomation\boot.wim' -Destination 'C:\boot\altiris\iso\sources\boot.wim' -Force
            Write-Host 'OSDCloudAutomation boot.wim file copied successfully.'

            # Add registry keys
            reg.exe add "HKLM\Software\OSDCloudAutomation" /v Version /t REG_SZ /d "$version" /f /reg:64 | Out-Host
            reg.exe add "HKLM\Software\OSDCloudAutomation" /v ExitCode /t REG_DWORD /d '0' /f /reg:64 | Out-Host

            # Remove the temp OSDCloudAutomation folder
            Remove-Item C:\temp\OSDCloudAutomation -Force -Recurse
        }
        catch {
            $ErrorMessage = $_.Exception.Message
            Write-Host 'Failed to copy OSDCloudAutomation boot.wim.'
            Write-Warning -message $ErrorMessage

            # Remove the temp OSDCloudAutomation folder
            Remove-Item C:\temp\OSDCloudAutomation -Force -Recurse

            # Add registry keys
            reg.exe add "HKLM\Software\OSDCloudAutomation" /v Version /t REG_DWORD /d "$version" /f /reg:64 | Out-Host
            reg.exe add "HKLM\Software\OSDCloudAutomation" /v ExitCode /t REG_DWORD /d '1' /f /reg:64 | Out-Host

            Stop-Transcript
            Exit 1
        }
    }
}
catch {
    $ErrorMessage = $_.Exception.Message
    Write-Host 'Failed to get boot.wim hash.'
    Write-Warning -message $ErrorMessage

    # Remove the temp OSDCloudAutomation folder
    Remove-Item C:\temp\OSDCloudAutomation -Force -Recurse

    # Add registry keys
    reg.exe add "HKLM\Software\OSDCloudAutomation" /v Version /t REG_DWORD /d "$version" /f /reg:64 | Out-Host
    reg.exe add "HKLM\Software\OSDCloudAutomation" /v ExitCode /t REG_DWORD /d '1' /f /reg:64 | Out-Host

    Stop-Transcript
    Exit 1
}

Stop-Transcript
Once a device has installed the OSDCloud WIM file it will then use this when booting to the automation folder :)